Tuesday, July 20, 2010

Tres Leche Cake...


Tres Leche Cake is a traditional Mexican 'celebration cake'. Latinos eat it for wedding cake and baptism cake and Quinceanera's....I had my first piece several years ago and am always begging for more! It is made with 3 milks poured over it and softened whip cream and fruit...there are many different recipes around, most with pineapple or apricots....You can use fresh berries in season...It is sweet cake....and perfect with a cup of good, hot coffee...this recipe is very easy and got a perfect '10' rating from everyone who tried it!

FOR THE CAKE:


1 box (18.25 Oz. Box) Yellow Cake Mix Or Your Favorite Yellow Cake Recipe For A 9X13-inch Pan
Additional Required Ingredients Specified In Mix Package (typically Water, Eggs And Oil)

_____

FOR THE MILK SYRUP:

1 can (15 Ounces) Cream Of Coconut
1 can (12 Ounces) Evaporated Milk
1 cup Heavy Whipping Cream
1 teaspoon Pure Vanilla Extract

_____

FOR GARNISH:
Fresh fruit of choice
Sweetened Whipping Cream
Toasted Coconut
Preparation Instructions

Place a rack in the center of the oven and preheat the oven to 350 degrees.
Lightly spray a 9×13-inch baking dish with cooking spray. Set the baking dish aside. Make the boxed cake mix or yellow cake according to box or recipe instructions (you’ll typically need water, eggs, and oil, as directed in mix package). Scrape batter into the prepared pan. Bake according to recipe/box directions. Remove the cake from the oven and place it on a wire rack to cool completely, 1 hour.

Meanwhile, make the milk syrup: in a blender, combine the cream of coconut, evaporated milk, cream, and vanilla and process until smooth.

Pierce the cooled cake all over the top with the tines of a fork or a thin wooden skewer. We are talking all over! The more pokes, the more the syrup will soak into the cake. Using a large spoon or ladle, spoon some of the milk syrup over the cake. Let the syrup soak into the cake, then continue spooning the syrup on top until all of it has been used up. When you have finished, not all of the syrup will be completely absorbed and might be pooling on the top but that’s ok because it will absorb as it refrigerates. Cover the cake loosely with plastic wrap and refrigerate until all of the syrup is absorbed, 2 hours.


 Serve the cake with softened whip cream and coconut and fruit of your choice...


poke holes in the top of the cooled cake, with a fork, .....


here are the three milks, (I do realize the last one is cream of coconut and not milk)

put all milk together and blend.....

pour the milk over the top of the cake slowly and let soak in,....

mine has alot of foam on top, maybe because I over whipped, cover with plastic wrap and let set in fridge overnight or at least 2 hours....

here it is the next day, after it has sat all night, in the refrigerator...

here is my 'little friend Flaco', I took my cake to work to share, I honestly can't be trusted with a whole cake......he gets the first piece...isn't he the cutest guy?

Cheers to Happy  !!

Monday, July 19, 2010

Hot Mustard...

Years and years ago I learned to make hot mustard, it is really easy and chances are pretty good you have the one ingredient you need...dry mustard!

you use this in your baked beans and...and...I can't think of anything else, but when you want hot mustard, the hottest of mustard...the one you get at chinese restaurants..it is as easy as reaching in your spice rack...


measure a couple tablespoons in a small bowl....


then stir in enough water to make a paste....


like this.....


then here is the trick...flip it over on the counter and leave it for 3 minutes....it is fire cracker hot...great on a sandwich...or in your egg salad...


or with your barbecue pork....Yummy Hot!

Cheers to Happy  !!

Saturday, July 17, 2010

S'more Sundae...

This summer while you have campfires or light your barbeque, this sundae is a great treat! it is self explanatory...vanilla ice cream, graham crackers, chocolate syrup and toasted marshmallows....toast the marshmallows on wooden skewers...leave them long so you don't burn your fingers, you can cut them after, you can also toast them if you would like on the electric range in your kitchen, (yes this is what I did and yes I burnt my fingers)...This will make every child and adult happy! No one can turn down a s'more, no one!

Cheers to Happy  !!
Thursday, July 15, 2010

Bread Salad...


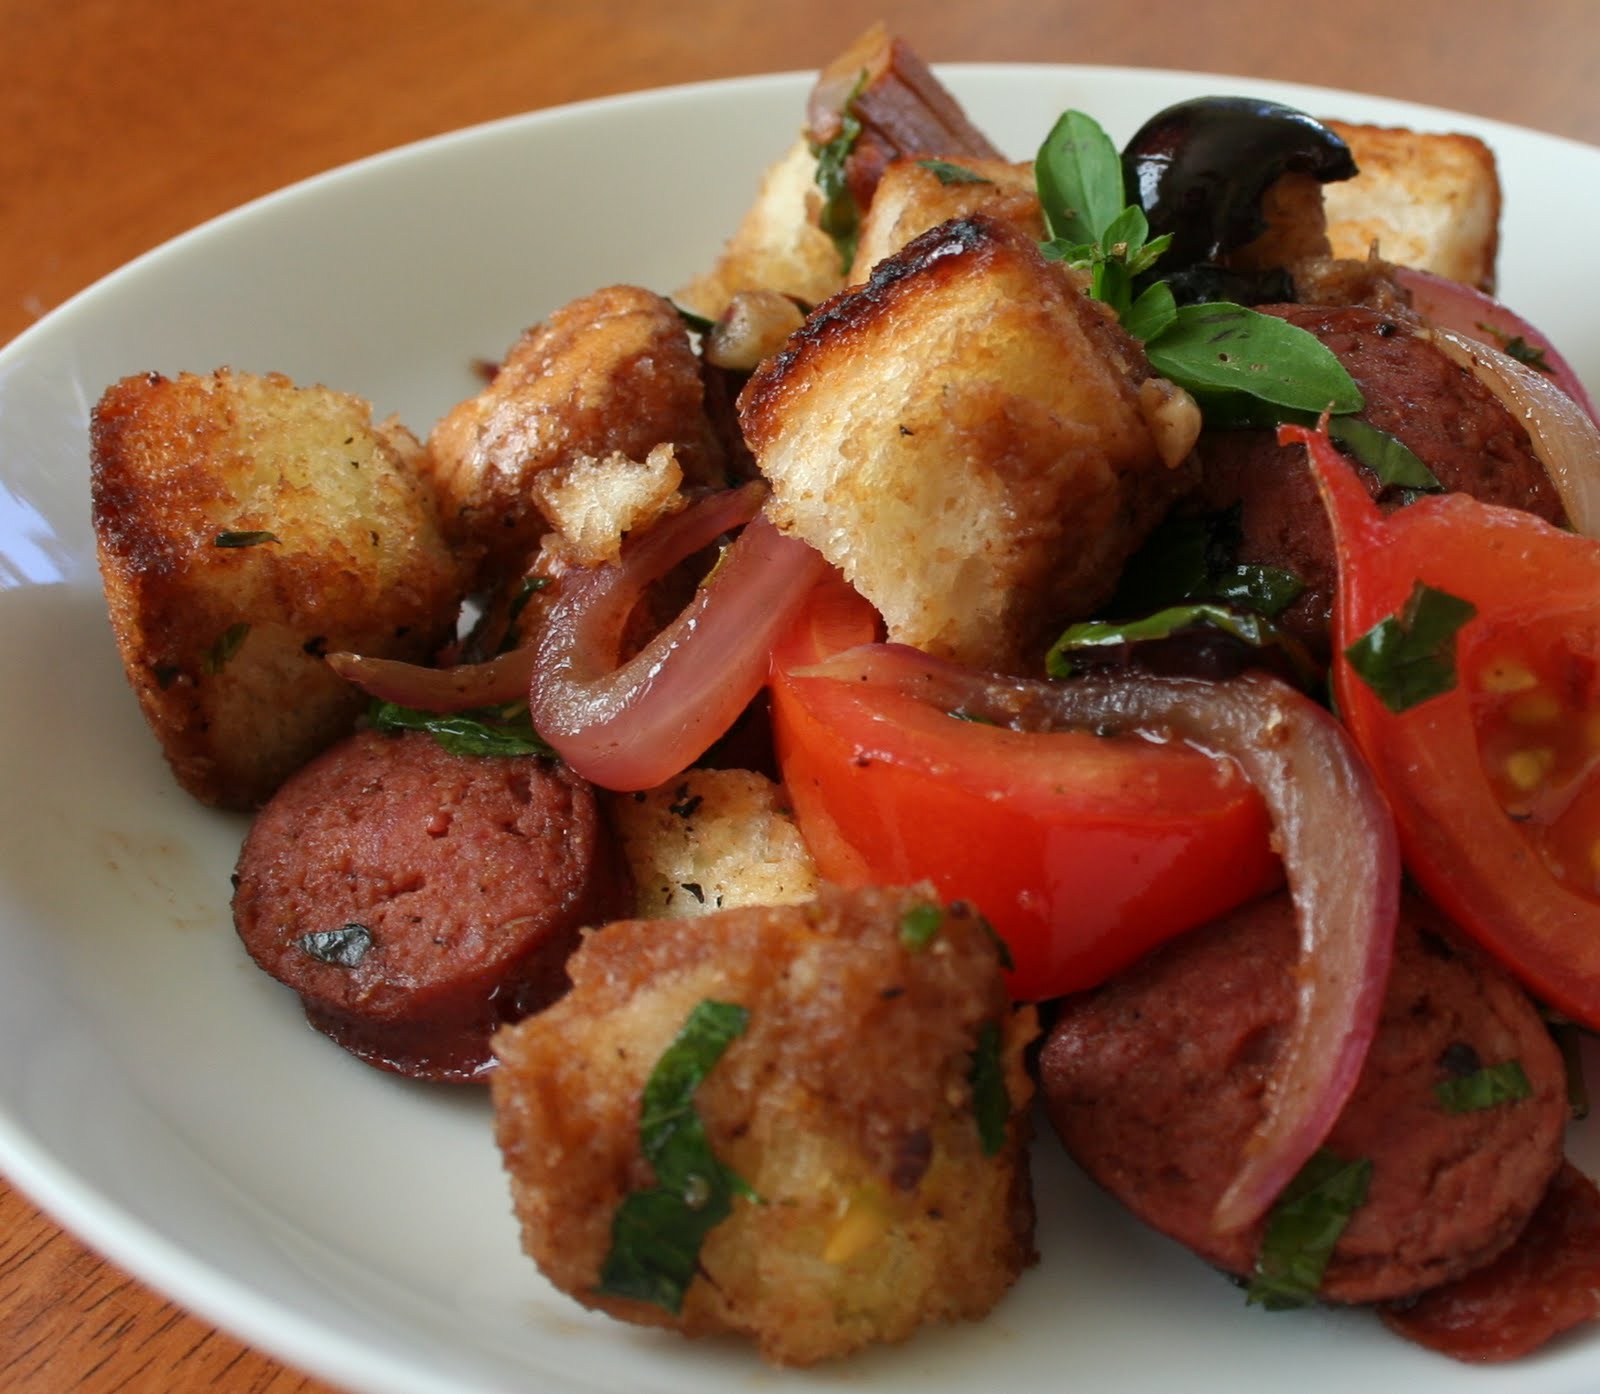
The other night I went to Primo Grill and ordered bread salad, I was remembering the bread salad my mother made and her mother before her, it was made with stewed tomatoes and chunks of bread, served in individual small bowls, ...I remember how much my mother liked it and how much I didn't, so it went into the category of 'when I grow up I will never eat that again'....When I saw it on the menu, and saw the ingredient list, it was a must have....It is so delicious! and yes, I am sure my mother would LOVE it!

Primo Grilled bread Salad

1 thick slice Ciabatta
1oz Extra Virgin Olive oil
1 Roma tomato, quartered lengthwise
1/3 Red onion, sectioned, a large red onion
1 Italian sausage, precooked and cut into 8 to 10 pieces
9 kalamata olives cut in half
1/2 t Garlic
Pinch Red pepper flakes
Pinch Oregano , or fresh oregano
4 oz Balsamic vinaigrette
1/2 cup Basil chiffonade
Salt and Pepper
Season bread with olive oil, salt and pepper, Mark well on the grill, cut bread into chunks and set aside.
Heat olive oil in a saute pan and cook the sausage and onion until golden and cooked through.
Add the garlic, oregano and hot peppers and toast the garlic slightly.
Add the tomatoes and cook slightly longer-tomatoes should be softened, but still have plenty of bite.
Combine with the bread, balsamic vinaigrette and basil. Toss to coat and serve. This recipe serves 2...

here is the list of ingredients....


saute the sausage and onions....cook until the onions are limp and cooked...


add the garlic and oregano and red pepper flakes...and cook another minute...


add tomatoes, olives and cook another minute...(aren't you getting tired of my blurry pictures?) I am wildly trying to stir and take pictures at the same time...


add vinegar, bread, and basil...just toss slightly...and....


serve....


Enjoy!!!! If you make this once you will be filled with ideas on how to change it up...adding swiss chard would be great, adding bacon instead of the sausage would be great, adding capers instead of olives, add any left over stale bread would work great...cherry tomatoes would work well, and walla walla sweet onions instead of red....make it your own!

Cheers to Happy  !!

Tuesday, July 13, 2010

Raspberry's and Blueberry's....

Raspberry's and Blueberry's, I grew up here in the Puyallup Valley and spent many of the summers of my teens picking berries. I sure ate my share! One for the box and one for me! I was never a good picker!!!...I am old and this is the first time in my life I have owned my own berry bushes! I love raspberries more than anyone else I know...and still had not had bushes until now...it is the funnest thing to go outside and stand and eat your own berry buffet..."I will this eat this one warmed by the sun" and, " this one I just will blow this bug off and down it goes", yum! I am like a crazed woman and can't get enough of them....

I pick them almost every day...and I eat them all, seriously I do!

Isn't this the prettiest picture! so northwest!

and here is the buffet line over at the blueberry bushes....

they are so perfect and so sweet and delicious....

Please don't wait until you are old to plant berries...It is one of the happiest things I have ever done!!!

Cheers to Happy  !!

Wednesday, July 7, 2010

Glazed Apple, Maple and Bacon Cake...


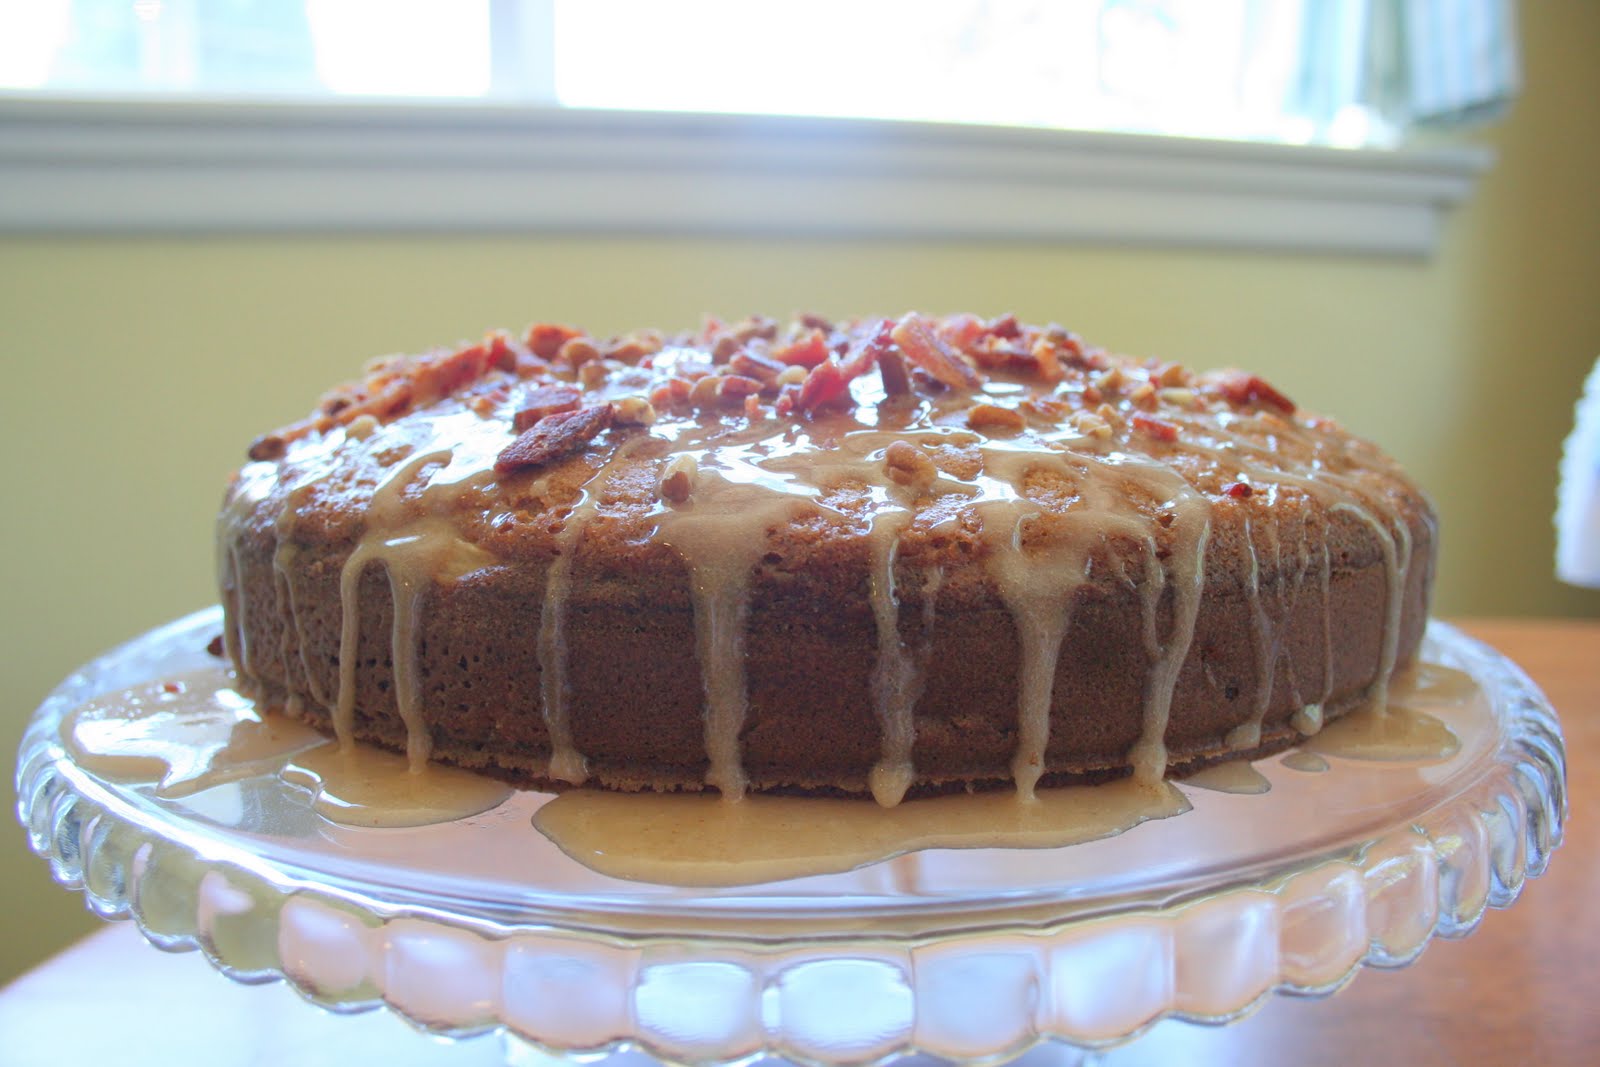
You know that amazingly delicious flavor that gets created in your mouth when you sit down to a plate of gourmet bacon and eggs, served up with pancakes and maple syrup? This is all that goodness in a cake and yes it is for breakfast..yum... it doesn't get any better, with bacon and butter and pecans and apples and maple syrup!

Everyone I know has those camping memories etched deeply into their minds of waking up to the wafting aroma of pancakes and bacon cooking and sitting down to enjoy a plate just seems to make the day feel like a dream come true.....


Glazed Apple, Maple and Bacon Cake

For the Cake
10 strips of Bacon 
2 cups all-purpose flour
2 teaspoons baking soda
1/4 teaspoon salt
1/4 teaspoon cinnamon
6 tablespoons unsalted butter at room temperature
2/3 cups sugar
3 large eggs
3/4 teaspoon maple extract
3/4 cups buttermilk
1 1/2 cup peeled, diced apples
1/2 cup pecans, coarsely chopped, save a few for the top

Ingredients For The Glaze:
6 tablespoons confectioners’ sugar
3 tablespoons maple syrup
A pinch of cinnamon

Directions:

First, be sure that your oven rack is in the middle / central position.
Preheat the oven to 350 degrees.
Use butter or cooking spray of your choice to coat an 8-inch-square pan, I used a springform pan... In a large skillet over medium heat, cook bacon, turning several times, until browned and crisp, 6 to 8 minutes.

Place the cooked bacon on a plate, between a couple of paper towels in order to remove excess bacon grease.

Chop 8 of the bacon slices finely, being sure to set 2 pieces aside for garnish.

 in a large mixing bowl, combine the flour, baking soda, salt and cinnamon, and set aside.

In another large mixing bowl, using an electric mixer, cream the butter and sugar. add the eggs and maple extract to bowl and beat at medium speed until light.

Reduce speed to low and add the buttermilk. Beat until well-blended.

Add dry ingredients one spoon at a time to the wet ingredients and mix till the contents are well mixed and fluffy in consistency.
Stir in the apples, pecans and bacon.
Pour the batter into the pan and smooth out the top with a spatula.

Bake for 40 to 45 minutes, or until the cake is golden brown and a cake tester inserted deep into the center comes out clean.
Transfer the cake to a rack and cool for 10 minutes.

Take the cake out of the pan Un-mold the cake and place on a rack to cool to room temperature before icing.

In a small bowl, whisk confectioners’ sugar, maple syrup and cinnamon until smooth and clinging to the back of a spoon. using a spoon; drizzle the icing in a “back-and-forth” motion across the cake.
Sprinkle with the reserved 2 slices of chopped bacon.
Allow to set for at least 30 minutes before serving...

                                                  buy thick sliced and as lean of bacon as you can find...

here are all the ingredients minus the butter, not sure why the butter is not here but I don't see it anywhere...

cake batter....all whipped up

bacon, pecans, and chopped apples....

I floured the sides of the pan just to make sure it came out ok, not sure if it needed it, just wanted some insurance....
out of the oven, and smelling GREAT!

out of the pan....and cooling...

the glaze for the top...
glaze and sprinkle with the remaining bacon and nuts...


I just love how this looks!

and here it is!...Ta Da!  it really doesn't taste like cake at all...it is the texture of banana bread...and about as sweet...definitely for morning with a hot cup of steaming coffee....around the campfire....

Cheers to Happy  !!

Monday, July 5, 2010

Cheese Sticks...

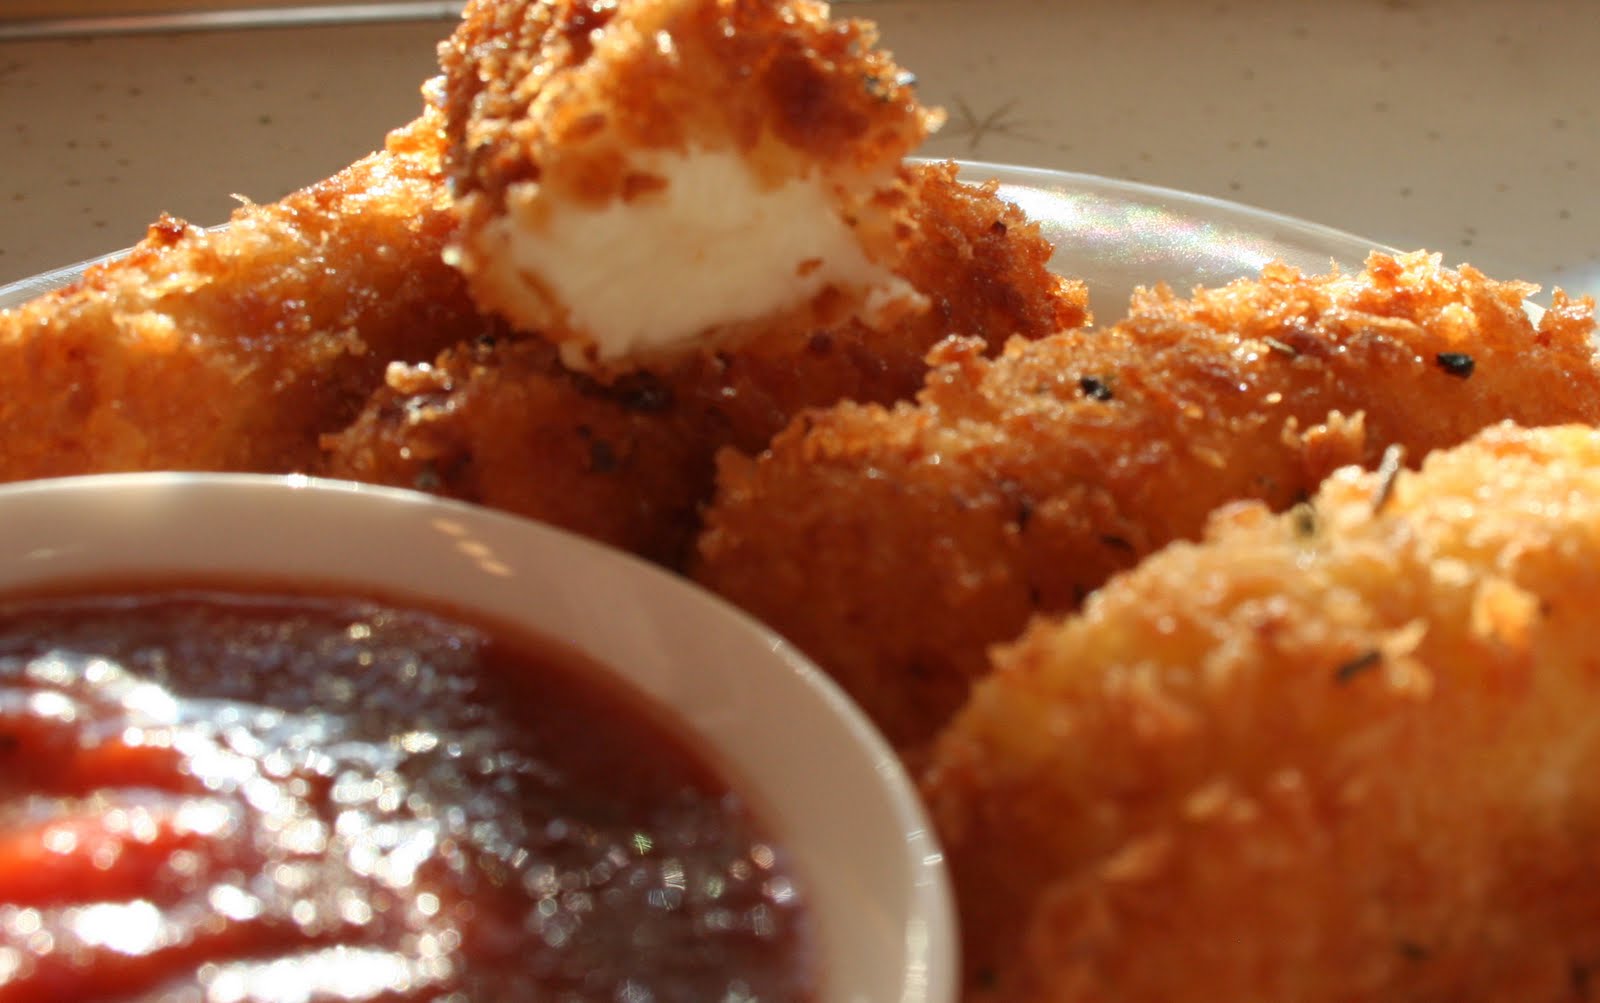
Yes it is worth it to make your own cheese sticks! The ones you get at your favorite restaurant, have a funny texture, kinda like rubber....these are really soft...it is because the cheese has never been frozen...They cook very quick! while you are breading you can do zucchini sticks the same way or prawns....Yum!

Cheese Sticks

•8 pieces String Cheese, Removed From Wrappers

•½ cups All-purpose Flour
•2 whole Eggs
•3 Tablespoons Milk
•2 cups Panko Bread Crumbs
•1 Tablespoon Dried Parsley Flakes
•Canola Oil, For Frying
•Pizza Sauce, For Dipping


Slice string cheese pieces in half, for a total of 16 pieces.

Place flour in a small bowl.
In a separate bowl, whisk eggs and milk.
In another separate bowl, combine panko bread crumbs with parsley flakes.
TO ASSEMBLE: One by one, roll mozzarella sticks in flour, then dunk in egg/milk mixture, then place in panko crumbs. Use your hand to sweep crumbs all over the mozzarella stick. Gently remove and place on a tray or cookie sheet. Repeat until all mozzarella sticks are coated.

TO COOK: Heat 1 1/2 inches canola oil in a large skillet over medium heat,to 350 degrees. When hot, add mozzarella sticks 8 at a time. Watch closely and turn over to evenly brown, cooking less than 2 minutes. Do not allow cheese to bubble and leak.
Remove to a paper towel-lined plate.
Serve immediately with warm marinara sauce.


Isn't this fun? You start with string cheese!

I used Pizza Sauce for dipping, but marinara sauce would be great too....

get your dipping ingredients ready, flour, panko and beaten egg....

roll in flour...

then in egg...

then in panko bread crumbs...

when they are all ready...

and the oil reaches 350, (you can use your candy thermometer)

put your cheese sticks in, this is a quick process...be ready to turn them....

you don't want to cook so long you leak cheese.....

drain on paper towel..(ignore the leaked cheese)

and serve immediately!!!!!

they are so perfect inside!

Cheers to Happy  !!