Thursday, August 1, 2013

Thai Glass Noodle Salad or Yum Woon Sen...


Summer has only one month left. If you are like me it has gone by much too swiftly, I wish I could stop time and just get a chance to catch up. The Northwest has had wonderful weather, sunny days and cool evenings. It has been wonderful to be outside all day and into the evening..

It is perfect for Thailand's Yum Woon Sen or Glass Noodle Salad...It is flavorful, and versatile. You can literally make it just how you and your family like it. Traditionally it is made with shrimp and fresh ground pork, and fresh vegetables...it always has cilantro and basil...you can make it with any shellfish, I think it would be very decadent to make it with lobster. Fresh cucumber would be a great addition, it can be served warm or cold...On the streets of Thailand it never has tomatoes, this is the Americanized version..I think the color is great.

Yum Woon Sen
Sauce:
juice of one lime
3 large cloves of garlic
5 teaspoons fish sauce
3 tablespoons soy sauce (can use gluten free)
1 tablespoon sesame oil
1 tablespoon peanut oil
3 quarter sized pieces of fresh peeled ginger
hand full of chopped cilantro
1-3 small Thai red chili's...1 for mild-2 for medium-3 for hot heat
1/4 cup of agave (optional) gives it a little sweetness, can add brown sugar or honey

Salad
3 cups cooked bean thread noodles
1 pound of 31-40 shrimp cooked
1 cup of green beans
1/2 cup of shredded carrots
1/2 cup of shredded white radish
1/2 cup of green onions chopped
1/2 cup of cilantro chopped
1/2 cup of basil chopped
1 cup of pea pods
1 cup of large chunks fresh tomato
1/2 cup of chopped peanuts or cashews
sprinkle of fried garlic (optional)
1 head of butter lettuce

Place all sauce ingredients in blender and blend until smooth...taste and adjust, if you need to

...should be very flavorful. Set aside
then boil your noodles, a little goes a long way. The noodles are bean thread noodles. You can soak them in hot water or boil gently until soft...

Now prep your vegetables for the salad...I used fresh from the garden, scallions, cilantro, basil, beans, peapods, carrots, white radish, and chopped tomatoes....the jar in the front is fried garlic....they sell it in the Asian store, much like canned fried onions that you use on top of the green bean casserole at Thanksgiving, but garlic...very handy to have around...

drain your cooked noodles and rinse with cold water....

Place in too small of bowl and then switch to a much bigger bowl....you will need room for all the vegetables and sauce....

mix all of the sauce, vegetables, and shrimp together,,,place in the fridge for at least an hour...the flavors will meld and absorb into the noodles...

put butter lettuce or shredded cabbage or chopped romaine on a platter,,,
 
and pile all you salad on top, sprinkle the chopped garlic and chopped peanuts on top...

and serve, makes a wonderful main course for hot summer days!!!
Enjoy!

Cheers to Happy  !!


Friday, July 19, 2013

Watermelon Aguas Fresca...


Watermelon Aguas Fresca or watermelon water. It is a standard in Mexico and Southern California. It is sold on street corners and in Restaurants. Aguas Fresca can be made out of any juicy fruit. Peach, Cantalope, Mango, any Berry or Watermelon. Watermelon Aguas Fresca or Agua de Sandia in Spanish literally translates to watermelon water. It can be made with a strong watermelon flavor or watered down. I made mine with about a cup of water. Some recipes call for up to 4 cups of water. Just taste it and decide. I boiled my cup with 1 cup of sugar, making a simple syrup to add to the strained juice.

            This beverage is so easy it is childs play...This is how we cut a watermelon fast at the restaurant...just cut off both ends then....

just skin down the sides, finished in a minutes time.... and cut into cubes...

put cubes in the blender and blend very, very well....

Like this, really puree it....

pour through fine mesh strainer, into a pitcher and repeat, until all the watermelon in juiced..

boil 1 cup of sugar with one cup of water, the sugar can be reduced, depending on how sweet you want your drink...

beautiful color....
 
then pour in the simple syrup you made ....
 
then squeeze in the juice of one lime or lemon....

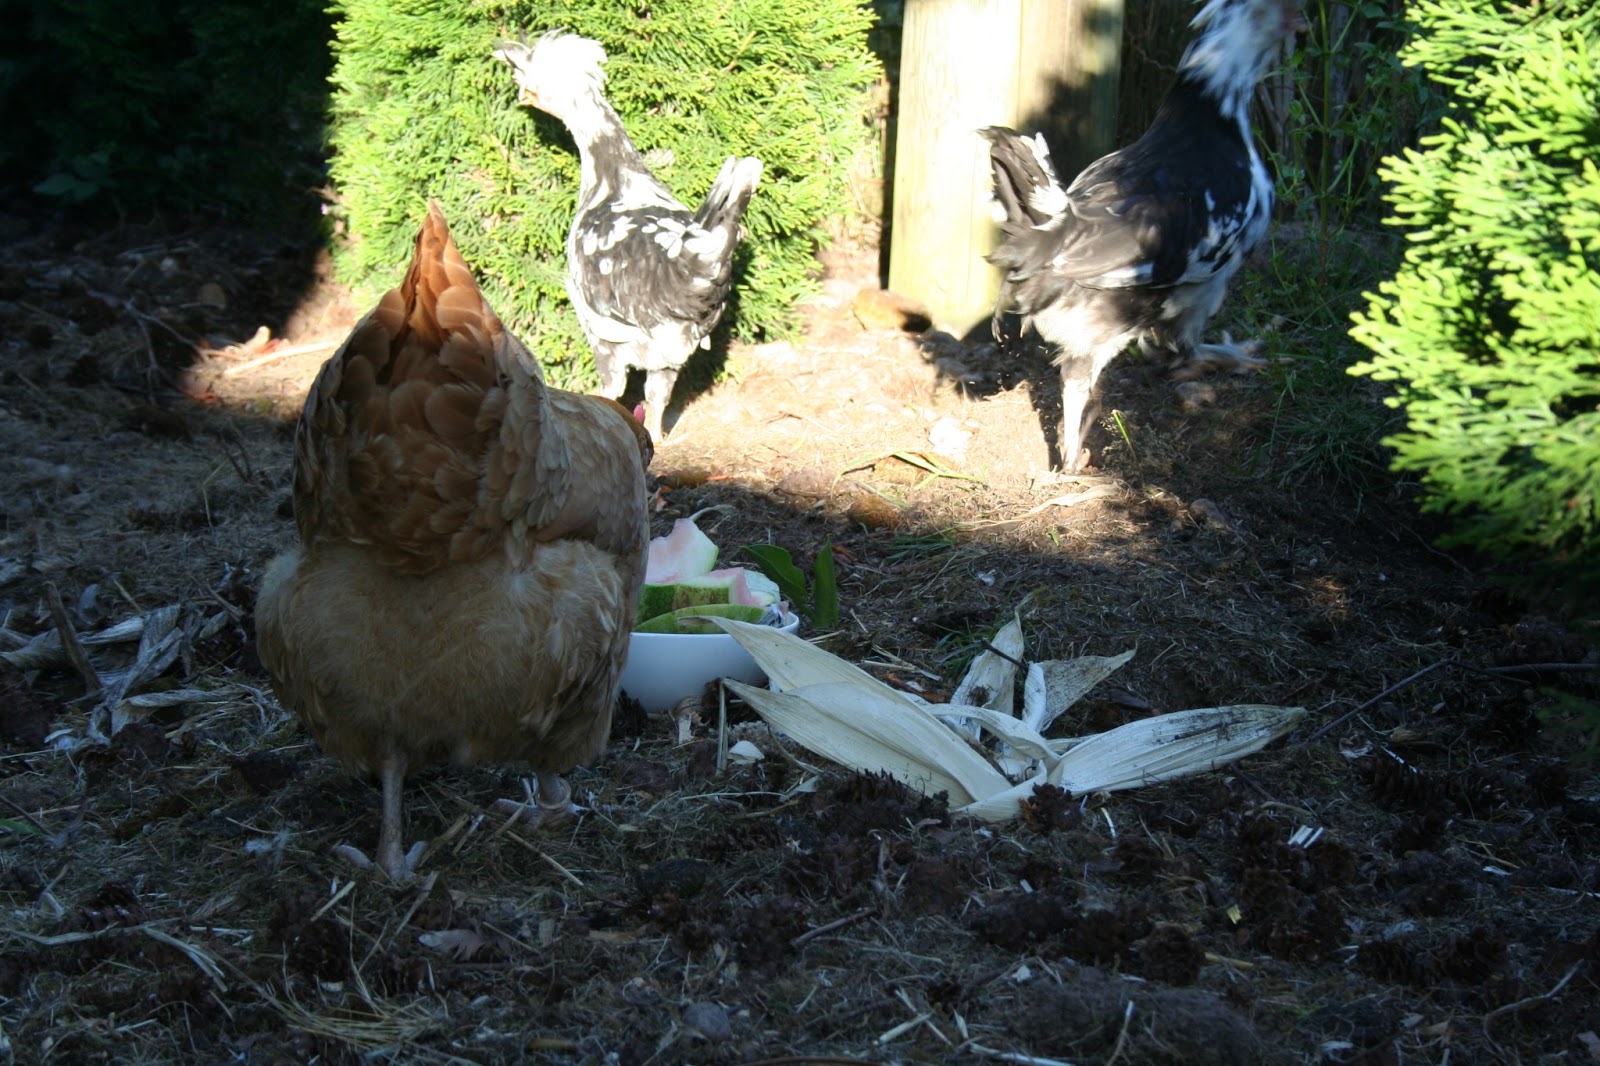
then take all the rind and pulp and place in a bowl and go outside to the compost pile....look behind to make sure your chickens are following...this is Rusty and Daisy...

see? Not only do you have a cool treat on a summer day so does your chickens! This is Daisy taking a big gulp...

there is plenty for the Houdans and Java....

Rusty chased them away...(yep this is really what I do for fun, follow my chickens around)

 oh....This is where the old compost pile was...this spring squash, beans and potatoes started growing so I had to move the pile over a bit....

 
Watermelon Aguas Fresca...Perfect!
 
Cheers to Happy  !!


Tuesday, July 9, 2013

Mexican Chocolate Cheesecake...


I wish you could all have a bite of this! You would love it so much! The cinnamon is perfect in it...the hint of chili powder, you don't taste until the very end, and then you would only know if someone told you. The chili powder enhances the other ingredients. When purchasing the chili powder you want a Mexican chili powder. I used a chipotle powder. If you use your standard chili powder that you use in chili it has salt and garlic in it also. So nix-ay on that...

Mexican Chocolate Cheesecake

Crust
1 1/2 cups crushed chocolate wafer cookies
3/4 tsp  ground cinnamon
3 tbsp.  butter or margarine, melted
Filling
1 1/2 cups  chocolate chips
1/2 cup  whipping cream
3 pkgs  cream cheese, softened
1/2 cup  sugar
1/2 tsp  chili powder
1/2 tsp  ground cinnamon
1 tsp  vanilla
3 eggs
 
Method:
  • Heat oven to 350ºF.  Spray inside bottom and side of springform pan with cooking spray. In small bowl, mix crust ingredients. Press in bottom of pan. Bake 8 to 10 minutes or until set. Reduce oven temperature to 300ºF. Cool crust 10 minutes. º
  • Meanwhile, in 2-quart saucepan, melt chocolate chips and whipping cream over medium-low heat; stir until smooth. Remove from heat. In large bowl, beat cream cheese, sugar, chili powder, 1/2 teaspoon cinnamon and the vanilla with electric mixer on medium speed until fluffy. Beat in eggs, one at a time, just until blended. Stir in chocolate mixture. Pour filling over crust.
  • Bake at 300ºF 1 hour or until edge of cheesecake is set at least 2 inches from edge of pan but center of cheesecake still jiggles slightly. Turn oven off; open oven door 4 inches. Let cheesecake remain in oven 30 minutes. Run small metal spatula around edge of pan to loosen cheesecake. Cool in pan on cooling rack 30 minutes. Refrigerate at least 6 hours or overnight.
  • To serve, run small metal spatula around edge of pan; carefully remove  side of pan. Cut cheesecake into slices. And serve. 


I found these great chocolate gluten free animal cookies to blend up into the crust. But you can use the chocolate wafers that come in a sleeve in the grocery store.
 
Blend the cookies to the amount of a cup and a half...

place in a bowl and add the cinnamon and the melted butter and toss together...

spread and press in the bottom of a springform pan...

before anything else, start beating and creaming your cream cheese. you will want to start with room temperature and then really cream it, scraping down the sides of the bowl often...

assemble the ingredients...

chocolate and cream melted is a genache ...

nice and smooth...and blurry...

add the sugar and cinnamon and chili powder and vanilla...

again really mix well, scraping down the sides of the bowl...stir in the eggs one at a time, always scraping down the sides of the bowl....

then mix in the chocolate.....scraping down the sides of the bowl...I know I sound like a broken record...but it is important...

pour over the chocolate crust...

place in the oven..bake for 1 hour....

perfect! turn off oven and let it cool in the oven with the door propped open for 30 minutes...

cool on a rack before putting in the refrigerator...best if made the day before...
 
serve with a sprinkle of cocoa powder and whipped cream....I also had some of the left overs with fresh raspberry sauce on it...Yum!
 
Cheers to Happy  !!


Tuesday, June 25, 2013

Angels on Horseback...


Angels on Horseback, what a funny name for an oyster and bacon...I tried to find out how that name came about...couldn't find an answer, just that they originated in England and were very popular there and in Australia too. They were popular here in the 60's during the Kennedy administration. There are a couple of ways to cook these, you can par cook the bacon and then wrap the oyster, and finish them off in the oven. The oyster will then be about half cooked. I like mine more cooked. Well done oysters for me! I used the extra small Olympia oysters from Washington State. They are the perfect size. They are meant to be eaten in one bite. So small is better...


Take a half slice of bacon and wrap around an extra small oyster, secure with a toothpick...oh and be sure to line you baking dish with foil, make clean up a breeze...

I then sprinkled them with salt, pepper, garlic powder, onion powder and chipotle powder...before they went into the oven...

 cook for 15 minutes at 425 degrees and then turn and continue cooking for another 10 minutes...

out of the oven! they smell great...If you are making these for an appetizer I would plan about 4 per person...BUT I can and did eat about a dozen.... I promise not to come to your party...

 
A squeeze of lime over the top and you have heaven on a plate!
Enjoy!
 
Cheers to Happy !!

Wednesday, June 19, 2013

Fresh Strawberry Ice Cream...


They are finally here!! The first Strawberries of summer! They are such a welcome treat, valley vine ripened berries. I couldn't wait to make fresh homemade ice cream. My mother and father always made ice cream. Years ago it was with a hand cranked ice cream maker and then the old model got upgraded to an electric one. Now, the counter top models can't be beat. They are so easy to use with little to no mess. It is always such a treat. I think my Dad's favorite was strawberry because that is the one that we had the most. It is so simple to make and with just 6 ingredients...


Fresh Strawberry Ice Cream
quart fresh strawberries, washed, stemmed and quartered
  • 1 1/2 cups granulated sugar
  • 4 cups half-and-half
  • 1 cup granulated sugar
  • 1 tsp. vanilla
  • 6 egg yolks

  • Directions

    In a food processor or blender, combine the strawberries and 1/2 cup of the sugar. Process until smooth. In a saucepan, over medium heat, combine the half-and-half and sugar. Bring to a simmer. In a small mixing bowl, whisk the egg yolks until smooth. Add 1 cup of the hot liquid to the egg yolks and whisk until smooth. Add the yolk mixture to the saucepan of liquid and whisk until incorporated. Bring the liquid back to simmer and continue to cook for 4 to 6 minutes or until the mixture coats the back of a spoon. Remove from the heat and stir in the strawberries. Whisk until smooth. Pour the mixture into a glass bowl and place a piece of plastic wrap directly on top of the mixture. This will prevent a skin from forming while cooling. Cool the mixture completely. Process the mixture according the ice cream machines instructions.

    whirl your berries...

    heat the milk and sugar...mix into the egg mixture..

    return to the pan, heat until mixture is slightly thickened...do not boil...

    add the berries and stir...cool in the fridge until cold and then process in your ice cream maker according to directions...at the very end I add a couple of cups of sliced fresh berries...

    Place in a container in the freezer until ready to serve! 

     
    The best way to spend those lazy, crazy days of summer....
    Enjoy!
     
    Cheers to Happy  !!