Wednesday, July 23, 2014

America's Test Kitchen goes gluten free...

Such a long space between posts! Time seemed to fly by, Not a moment to spare...But I sure miss my happy place. As you all know I am a huge fan of America's Test Kitchen. Their recipes are tested and retested, they tell you the science behind why recipes work. They tell you the best ingredients to use and why the ones they suggest work so well. It has always been my go to cookbook. When I found out they came out with a Gluten Free Cookbok I ran to the store to buy it. I read it cover to cover and decided I would make the recipes and  share with you and let you know how they worked! I know many of you that read my blog are not gluten free. I have been on a mission lately to find good gluten free food. I have wasted my money and have eaten some really crummy ucky gluten free foods. Some things are ok...but rarely good. As with most things, homemade is usually better than store bought. Many less preservatives and fresh is always best.

I will start with America's test kitchens flour mix. They tested many, many, different store bought flour mixtures. Their two favorites were Bob's Red Mill All purpose gluten free flour and King Arthur's all purpose gluten free flour. They weren't completely sold on either one but if you do buy a flour mix at the store ATK recommends buying one of these two. They decided to develop their own mix. They put their team together and tested hundreds of recipes using different ingredients finally arriving at the formula that worked the best for an all purpose gluten free flour


24 ounces (4 1/2 cups plus 1/3 cup) white rice flour
7 1/2 ounces (1 2/3 cups) brown rice flour
7 ounces (1 1/3 cup) potato starch
3 ounces (3/4 cup) tapioca starch
3/4 ounce (3 tablespoons) nonfat milk powder

Whisk all the ingredients together in a bowl and transfer to an airtight container and refrigerate for up to 3 months. America's Test Kitchen strongly recommends a scale to measure the flours...I did not do that but that is on my must have lists...a digital scale...

Americas test kitchen strongly recommends using Bob's red mills gluten free flours for your mix if at all possible. Most are readily available at grocery stores with out going to specialty health food or organic whole food markets. So first make your flour and next lets make bread!!!

Cheers to Happy !!


Wednesday, January 15, 2014

Chocolate Lasagna


I recently went and spent a night at my daughters house. We played the most fun game. I think every house should own. It is a great game that gets people interacting, and all ages can play together and have fun!
 
It is the hedbanz game. Simple game like charades. You have a word on your headband and although you don't know what your word is, everyone else does. Someone gets to act it out and you get to guess. Fun, huh? Then my daughter made this best ever dessert! It can be made gluten free or not. She made it both ways.
 
Chocolate Lasagna


Gluten Free Chocolate Lasagna
 Ingredients:
-

2 packages of GF Oreos 36 total
- 6 TB melted butter
-8 oz. cream cheese room temperature
-12 oz cool whip divided
-1/4 cup granulated sugar
-2 chocolate puddings (1.4 oz) I -


3 1/4 cups milk
-1- 1 1/2 cups mini chips

To make:
you need a 9x13 inch rectangle pan,spray it with cooking spray. 
 

1-Crush the cookies in either a gallon bag with a rolling pin or my personal preference, a food processor. (it takes 2 seconds) Next, add the butter and mix it together and press into a 9x13 pan, then set it in the fridge to rest.
2-you need your cream cheese, 2 TB milk and sugar, mix them together until light and fluffy, then mix in 1 1/4 cups cool whip until it is all incorporated, then spread over the crust.
3-Mix your pudding with a whisk and 3 1/4 cups cold milk, let it set up for 10min to firm up before you spread it over the cream cheese filling.  I let it chill in the fridge for a few minutes before I go onto the next step.
5- Lastly, spread the rest of the cool whip on the top of the dessert and sprinkle with the mini chocolate chips, then put in the fridge and for at least 4 hours, I would put it in the freezer for a solid hour, it makes it so much easier to cut and serve(this way it won't all slide off the spatula,and still look PRETTY!!)


You will love this!!! (and get the game)

 Cheers to Happy!!!

Saturday, November 23, 2013

Turtle Pumpkin Cheesecake...


This is such a wonderful dessert for the upcoming holiday...this is a great dessert to make the day before the big day. It holds well for several days in the refrigerator, it just gets better and better...

Turtle Pumpkin Cheesecake
Crust
1 1/2 cups chocolate cookie wafers
1/4 cup of melted butter

Filling
1/4 cup of flour
3 tsp of pumpkin pie spice
1 15 ounce can of pumpkin
4 8 oz packages of cream cheese, softened
1 cup packed brown sugar
2/3 cups white sugar
5 eggs

Topping
1/2 cup toasted pecans
2 oz bittersweet chocolate, coarsely chopped
1 tablespoon vegetable oil
1 cup of caramel topping

Heat oven to 300 degrees, mix cookie crumbs and melted butter in 9 inch spring form pan...spread all over bottom of pan and bake in oven for 8-10minutes. Cool at room temperature for 5 minutes.

Meanwhile in another bowl mix pumpkin, flour and pumpkin spice...set aside.
In a large mixing bowl with a electric mixer whip the cream cheese until smooth and creamy, scraping down sides of bowl. Gradually beat in brown sugar and granulated sugar...
On low speed add eggs one at a time...mixing after each one...Gradually add in pumpkin mixture until smooth...pour over filling....

Bake I hour and 15 minutes until set on the edges and the center is still shaky, open oven door and let cake sit in the oven until cool...take out of oven and cool further on wire rack...place in the refrigerator and cool at least 6 hours of better overnight...

Just before serving, sprinkle toasted pecans over the top of the cake...heat the chocolate pieces up with the oil and spoon over pecans and the top with the caramel..adding more to the plate when serving...

pretty simple ingredients...I used gluten free Jo Joe's from, Trader Joe's for the crust....they worked well...if you eat gluten try the chocolate cookie wafers that are in a sleeve in every store...

 crumb the cookies, I used the blender but a food processor would work great too...


add melted butter and stir...spread evenly over the bottom of the pan and bake for 8-10 minutes...'


mix pumpkin, flour and spices...blend....


cream the cream cheese...


add sugar and eggs, beating after each one....


add pumpkin mixture....


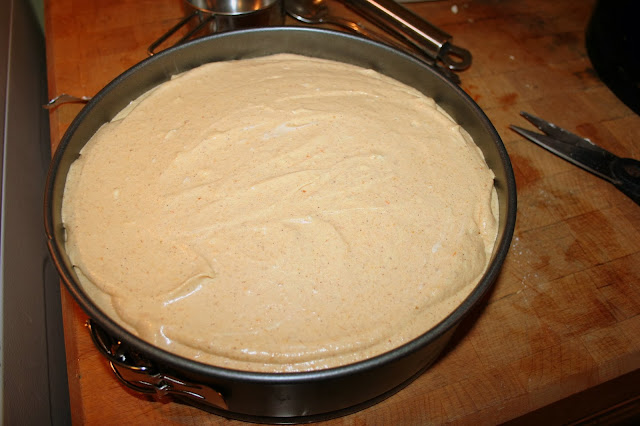
pour over crust and place in the oven...and bake for 1 and a half hours and then...


cool in the oven that has been turned off and the door is propped open...

take out of oven and refrigerate, until time to eat...


roughly chop pieces of chocolate...

Toast the pecans in a pan.......

ta-da!!!!! the pecans are sprinkled on the cake and the chocolate drizzled...now ready for the caramel...


This is the best darn cake...holds up well in the refrigerator...if you don't eat it in one day.....

Cheers to Happy  !!!!!

1

Wednesday, November 13, 2013

Organic Smoked Chicken Salad...


Organic Smoked Chicken Salad....so good!!! We make this at my restaurant. It is a very popular salad. The good part or bad part, about having Celiac is, when I have a craving for something, I have to make it for myself, in my own kitchen. Recently I have been looking at this salad being served and smelling the smoked chicken and it makes my mouth water, so I decided it was time to make it for myself, at my own house. So in doing this you too get this special recipe and simple procedure from my house to yours!!!


This is a very simple procedure recipe! You start with a heated groovy pan or a hot plain skillet.

melt a half a cup of butter with 2 tablespoons liquid smoke, although this seems like a lot of liquid smoke, it is important for the flavor...

take two boneless, skinless chicken breasts and salt and pepper them on both sides...

place in hot skillet and liberally baste with smoked butter. Cook approximately 7-8 minutes on both sides...

still liberally basting with smoky butter...until chicken reaches at least an internal of between 165-180 degrees...(Your kitchen will smell heavenly at this point)

in the meantime toast some hazel nuts over medium heat until crisp but not burnt.

 
Here are the ingredients of this wonderful salad: organic salad mix, dried cranberries, fresh apples, blue cheese, toasted chopped hazelnuts and either homemade or store bought Italian vinaigrette...

and here you have it! toss the salad greens in the Italian vinaigrette, the sprinkle with the blue cheese, dried cranberries, hazelnuts and sliced apples. Then lastly slice and fan out the hot, delicious moist and well seasoned smoked chicken breast....Enjoy the best fall salad ever!!!!
 
Cheers to Happy  !!


Wednesday, November 6, 2013

Home Made Dark Truffle Oil Fries...


Dark Truffle oil...hmmmm...This intensely fragrant finishing oil is made from the highest quality Italian olive oil infused with clean, concentrated black winter truffles. Wonderfully earthy, it's heaven when used in risotto, pasta, or egg dishes or when drizzled over fresh mozzarella pizza or macaroni and cheese. I have read many times about truffle oil and still have never had it. It might be because of the price. It is very pricey..anywhere from $10 dollars to $50 dollars. I found mine at Trader Joes and paid the $10 dollars. I knew it was a gamble but I was sure I would love it. My boss at work has suggested we make Truffle fries on a new menu. I knew I better step up my game and at least try it. Man oh man, am I glad I did. It is so flavorful and delicious. There is no need for ketchup. It is so good plain.
 
 
cut your fries in even strips or use a mandolin to make even fries.

 
deep fry at 375 until perfectly golden brown.

 
drain the oil off on a piece of paper towel and sprinkle with course salt and pepper.

 
then sprinkle with the black truffle oil...

 
I used a separate pan. use sparingly. It doesn't take much.

 
toss back and forth...

 
place on a paper towel and shred parmesan cheese on top...

 
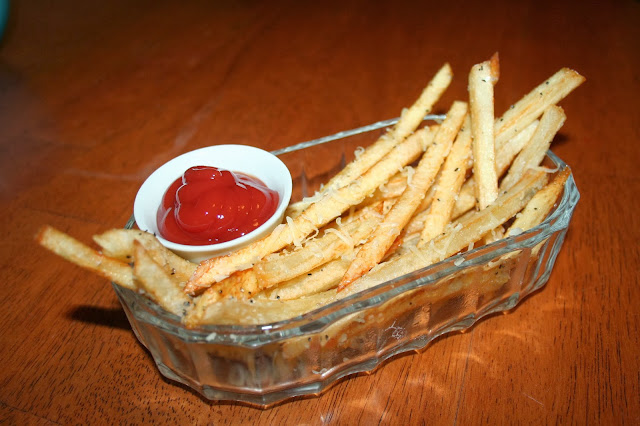
Now serve the very best French fries you have ever eaten! Guaranteed!!!
 
Cheers to Happy !!!
 

Wednesday, October 9, 2013

Infused Water...


It is fall in the Pacific Northwest. Today is one of those crisp fall days, the leaves are turning and starting to fall. Our Mountain is full of snow, and she is absolutely, breathtakingly stunning!

I haven't posted one of my favorite things in quite a while. I found and bought these jars a month or so ago. First I wasn't sure what I was going to do with them, maybe use them for canning. Do you ever see something at the store and you must have it? You don't need it, but you convince yourself you do.
 
Well I needed these jars, really, really needed them...so much so, that I went back and bought another pack for back-up in case I broke a jar....
 
 
I started using them for beverages, and liked them so much that I rearranged my cupboard and now they have permanent residence there...For several weeks I have been making my own infused water. This one is just slices of lemon, lime, orange, cucumber and mint...You can refill it daily. Use the same fruit in it for up to 3 days before slicing some new. It is delicious and I am sure healthy!
 
Cheers to Happy !!
 

Sunday, September 29, 2013

Grilled Chicken Wings...

In my search for the perfect wings, I tried yet another recipe, this is my favorite so far!!! It is from America's test kitchen and it is so perfect!!! It is a great recipe to use right now during football season for those tailgate parties!! You are a Seattle Seahawks fan, right? I thought so! How about that game today? Wow!!!! They are amazing!


This recipe is so flavorful, the chicken is tender and crisp on the outside. I love the little charred edges. It is very difficult to BBQ chicken and especially the wings without burning anything. But these came out perfectly!


You start with a few ingredients that you may already have in the kitchen. The wings, cornstarch, salt, onion powder, chili powder, pepper, garlic.

 
 put 2 quarts water in a bowl and then add 1/2 cup of salt, mix until salt in dissolved... Add your wings in the brine and refrigerate for 30 minutes, (any more and it would be too saltly)
 
 
Here is a trick I recently learned, If you have a lot of meat to either marinate or brine, empty your bottom drawer in the fridge and wash very clean, marinate or brine directly in the drawer. Then of course wash very well in bleachy, soapy water to kill all bacteria.


season 3 large tablespoons of cornstarch...1 tsp of onion powder, 1 tsp garlic, 1/2 tsp chili powder, and a 1/2 tsp pepper...toss together and then toss in your brined chicken wings that you have patted dry

 
Just to coat, do this right before grilling....place on a medium to low grill

 
place the skinniest side of the wing down, and cook for about 20 minutes and then turn, cook for about another 15 minutes...

 
You want the internal temperature of the wings to be 185 degree. They are cooked at 165, but the collagen have not broken down until it at least reached 180...it will be so tender and not falling apart...

 
These wings are the best!!!!

 
Toss in Franks buffalo wing sauce or your favorite, I had mine with a homemade ranch dressing with a bit of blue cheese in for flavor....They also taste great plain! They are tender on the inside and crisp on the outside!!!!
 
Cheers to Happy  !!!